 |
| Auto cad 2007_Chem-Eng21.blogspot.com |
TUTORIAL 1
AutoCAD 2007
3D Modeling
Before starting this tutorial, you should have been able to:
• Use the 3D Modeling
tools available in previous
releases of AutoCAD
• Use AutoCAD at an intermediate
to advanced level
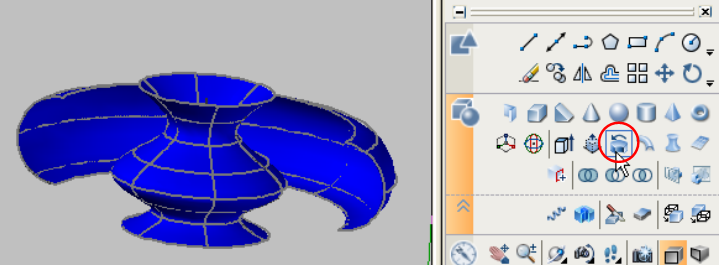
The new 3D modeling tools in AutoCAD 2007 allow you to model complex
freeform shapes that previously were not possible
to model in AutoCAD. This tutorial
assumes that the user is completely familiar
with creating precise
2D sketches of arcs, lines, polylines, and splines
in any location as well as the 3D tools from previous
releases.
 |
| 3D Modeling Workspace |
1. The
first thing I would do is turn off the grid. In almost
20 years of doing CAD I have not had anyone give me a
convincing reason for using a grid
except for a few
narrowly defined cases. I consider the use of a
grid the mark of an amateur.
Notice that there is a
new
tool in the tray marked DUCS. The Dynamic
User Coordinate System will allow you to sketch
on planar faces of solids without having to manually
change the UCS.
I would also turn on the LWT lineweight and experiment with the Settings display scale to get a
thickness you can easily
see.
 |
| Figure 1 |
2. You may need to experiment with background settings to see you sketch linework.
 |
| figure 2 |
3. In the upper right hand corner of the screen you will find the new Dashboard.
4. If you move the mouse to the gray bar in each of the control panels
a down pointing chevron
will appear that will reveal more tools if you click on it.
5. Right
Mouse Button (RMB) click in one of the control panels of the Dashboard and set the visibility of the control
panels as shown. Expand the 3D Make
control panel. This will give you access
to both the 2D Draw and the 3D Make
tools.
Figure 5
6. In the lower right corner
of the screen you will find the Tool Pallets.
I prefer to have
the Modify tab
selected. (You should
know how to customize the Tool Pallets from previous releases.)
I prefer to have the tool description text turned
off and I have added a
few
tools that I use often, particularly Shell,
which were left off of the Dashboard. Unfortunately, the Dashboard cannot
be modified.
• Select the Polysolid tool and RMB Select Object
and click on the
wireframe sketch.
Undo and then experiment with different settings
for Justify, Width, and Height.
• Select the Polysolid tool and RMB Select Width,
experiment with the settings.
• Select the Polysolid tool and RMB Select Height,
experiment with the settings.
• Select the Polysolid tool and RMB select Justify, experiment with the settings.
8. You should be able to figure out how to use these tools on your own. Pyramid
is new.
Figure 8
9. Turn
off all layers except
the Extrude Surfaces
layer and make it the
active layer.
Surfaces in previous releases of AutoCAD
were of limited value, but in AutoCAD 2007 surfaces
can be used to edit solids.
Figure 9
10. Turn off all layers except
the PressPull layer and make it
the active layer. Do a
List (li) on the entities
and notice that there is a polyline, line, arc, and spline.
Figure 10
11. Select the Presspull tool (or hold Ctrl + Alt)
and click inside
the closed boundary and pull up a solid.
In previous releases you would have had to have a
closed
polyline boundary to get something similar.
Figure 11
12. Draw a circle on the face of the solid.
(You might want to turn off osnap and set your
active color to something other than the solid color. (I will assume
after this that you are an experienced 3D user and not bother you with the obvious.)
Notice that with the new Dynamic UCS that you did not have to reset your UCS
to the top of the solid to draw a
circle on that face. Try drawing another
circle on
one of the vertical planar faces.
Figure 12
13. Select the Presspull tool again and click in the circle and move the cursor below the
solid to “press”
a hole through the solid. Repeat
for the circle on the vertical face. In previous releases you would have had to create a solid
cylinder and then subtract. If you wanted to “match
machine” drill through multiple
parts you can use
the Presspull tool multiple times and the individual parts will remain
separate parts with matching holes.
Figure 13

Figure 14
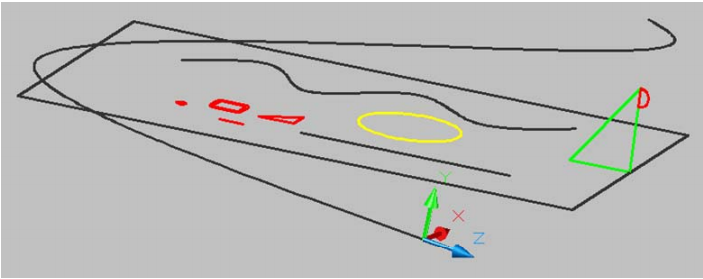
15. Turn off all layers except the Sweep layer and make it the
active layer. Start the
Sweep command and select the green triangle
as the object to sweep and the polyline rectangle as the path.
Figure 15
16. Start the Sweep command
again and select the red semi‐circle as the object to
sweep. Hold down the Ctrl key and select
the top edge of the triangular profile solid as the sweep path. Undo
this step.
|
17. Type in the command
XEDGES and select the swept triangular profile solid. The xedges command extracts the edges of a
solid. Join the extracted top edges of the solid
into a polyline. Sweep the semi‐circle along the joined polyline
path.
Figure 17
18. Undo back to the xedges
command. Notice that right angle of the swept triangle
follows the rectangular path. Delete the swept solid. Start the Sweep tool and select the red triangle as the sweep object and the rectangle as the sweep path. Change the Visual Style
to 3D wireframe and notice that the rectangular path runs through the middle of the triangular
profile. If the profile
is not perpendicular to the path AutoCAD
realigns the middle of the profile to the path. Therefore you may need to explicitly locate your sweep profile.
Figure 18a
19. Delete the solid.
Type in the command UCS with the ZAxis and Object options
and
click on the end of the 3D spline.
Repeat the UCS with ZA and O options
and click on the other end of the 3D spline.
Repeat selecting different entities. In AutoCAD 2007 the new ZAxis
option for setting the UCS makes it very
easy to set to a line,
arc, polyline or spline end. Set the UCS back to World.
20. Sweep the red circle
along the line, polyline
rectangle, 2D spline, and the 3D spline.
Undo and then sweep along the 3D spline using
the Alignment, No options. Delete the solid.
Figure 20
21. Sweep the square tube region along the line as shown.
Figure 21
22. Sweep the region along the 3D spline
path (this one may take a
few seconds to complete). Undo the sweep.
Figure 22
23. Sweep the region again
this time using the Twist option and enter
270° as the twist angle.
Figure 23
24. Sweep the region along
the rectangular polyline path.
Figure 24
25. Sweep the blue line as a surface
along the line path, rectangular polyline, 2D
polyline, and 3D polyline
paths.
Figure 25
26. If you haven’t
already done so, expand the 3D Make control panel
to reveal the new Helix
command.
Figure 26
27. Turn off all layers except the Loft layer
and make it the active
layer.
Figure 27
28. Loft the line to the arc and the polyline rectangle to the circle. Experiment with the Loft Settings. After experimenting undo and Loft with the Smooth Fit surface control.
Figure 28
29. Turn on the Loft with Guides
layer and loft the polyline rectangle to the circle
with the Guides option and select the 16 guides.
Figure 29
31. Turn on the Loft with Path layer and loft the circles and arcs along the arc paths.
Figure 31
32. Turn off all layers except
the Planar Surface layer and make it the active
layer.
Select the Planar Surface
tool and choose the Object option and then click on the circle the polyline rectangle and all of the edges of the irregular shape
comprised
of a polyline, arc, and spline.
Figure 32
33. If you haven’t already done so, expand the 3D Make control panel to reveal the
Thicken Surface tool and use it
to thicken the planar surfaces.
Figure 33
34. Draw some closed shapes on the thickened
surface solids. With DUCS active you do not have to change
ucs to planar faces.
35. In AutoCAD 2007 is no longer necessary
to create a 3D solid to imprint
on a planar face of another
solid. Select the Imprint tool and imprint the planar closed boundaries on the planar faces. Use the Color Faces on the Solids
Editing toolbar to change the face colors.

Figure 35
36. I don’t have any examples for the Section
Plane and the Flatshot
tools at this
time. I use the solview,
soldraw, or solprof
commands to create
2D layout views. I guess if you wanted these views as modelspace blocks you might
find these useful.
I would be interested in hearing about
your implementation of these
tools (please include
dwg files if you contact me).
Figure 36
37. Turn off the visibility of all of the layers
except the Helix layer and make it
the active layer.
Figure 37
38. Sweep the blue polyline rectangle
along the helix and spiral paths.
Experiment with the Helix tool to create various helix/spiral curves.
39. Turn off all layers except
the Slice layer
and make it the active
layer. If you
examine the entities you will find a solid
and two lofted surfaces.
41. Repeat Slice for the other side and place the surfaces on the Hidden Surfaces layer.
With combinations of extruded, revolved,
planar, swept, and lofted
surfaces used as Split
tools complex freeform
solid shapes can be modeled in AutoCAD 2007.
42. I do not have any uses for the Convert
to Solids or Convert to Surfaces tools at this
time.
Figure 42
43. Turn off all layers except the Ctrl Select
layers and make it
the
active layer.
Experiment with selecting faces,
edges, or vertices while holding the Ctrl key and
then editing the shape.
Figure 43
44. You can also Thicken
many surfaces to solids.
Go back to the surfaces created
earlier and try using
the Thicken command. Experiment with different distances
– both negative and positive.
45. Check the Help files
for new information on the following
System Variables or
Commands:
delobj
3dalign vs align
solidhist legacyctrlpick
Shift + Spacebar cycle pick
To be continued..!


0 Response to "Tutorial AutoCAD 2007 3D Modeling"
Post a Comment